#100DaysOfCloudDevOps Challenge — Day 03 — Day-to-day Linux commands used by Cloud DevOps Engineers

Welcome to Day 03 of my #100DaysOfCloudDevOps challenge!
In this article, I'll explore some fundamental terminal or command-line commands that Cloud DevOps Engineers should know.
Understand the Linux commands using analogy
Before we start I want you to understand the Linux commands using this analogy: think of Linux commands like shorthand notes in a busy office. Just as shorthand helps office workers jot down important information quickly and efficiently, Linux commands provide users with abbreviated instructions to interact with the operating system swiftly.
Linux commands let you enter a command into the terminal or command-line and press Enter, the system interprets and executes that command, carrying out the specified action.
Imagine if every time you needed to convey a message in the office, you had to write out every word in full detail. It would slow down communication and make tasks cumbersome. Similarly, using complete English words for every operation in Linux would make commands lengthy and tedious to type.
Instead, Linux commands opt for concise abbreviations or short phrases to represent common operations. This shorthand not only saves time but also aligns with the ethos of efficiency and simplicity that Linux is known for. Just like shorthand in the office, Linux commands allow users to communicate with the system effectively, getting tasks done swiftly without unnecessary verbosity.
Now, let's take a look at some of the most commonly used Linux commands and what they do, in plain and simple language.
First, setup the environment
From my last blog I mentioned how I want to explore Linux commands using a separate space or container. See how I did it here.
To start in this challenge, log in to our provisioned VM. I use
vagrant sshand gain access to my container-based environment.
Most used Linux Commands:
man: An interface to the system reference manuals
man will be your best friend as you learn the commands. man is how you find the information you need to understand how any command works. To escape the man pages you should press q for quit.
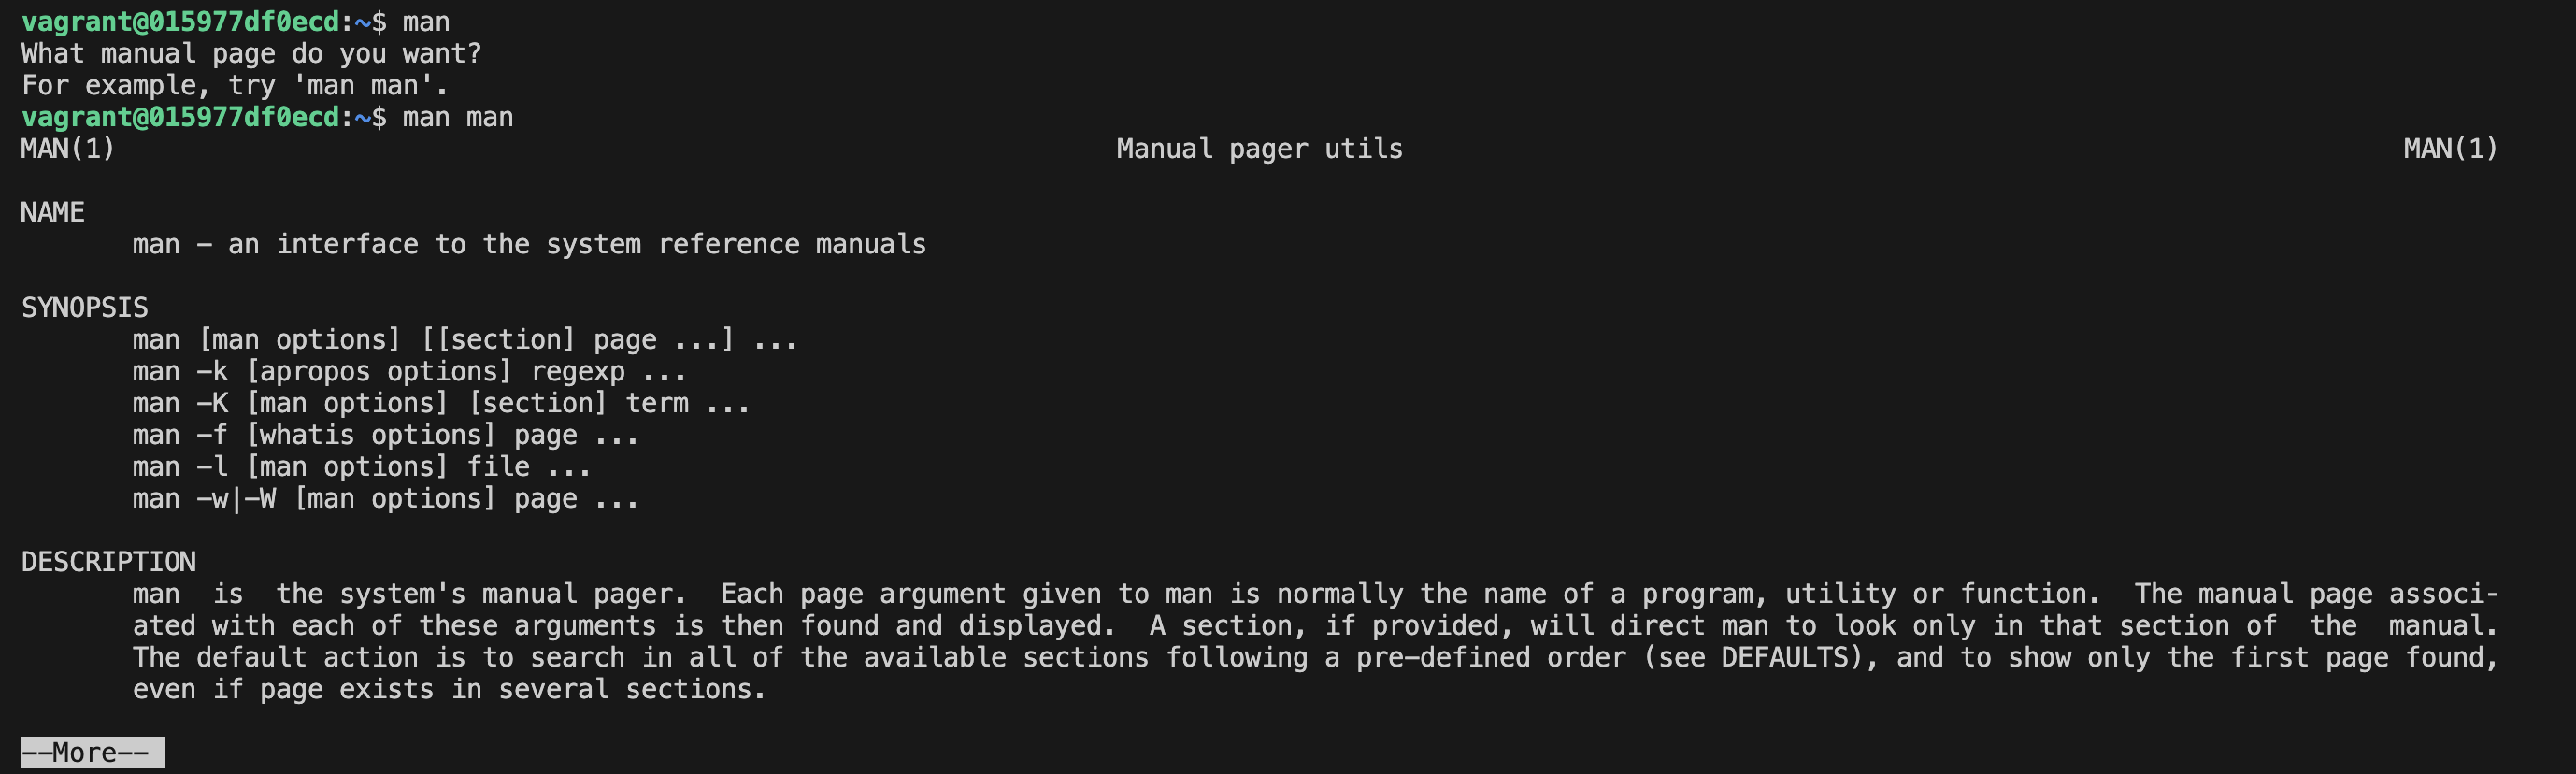
man mkdir: to see all the options for themkdir("make directory") commandman cat: the command to understand more about whatcatis and how to use it
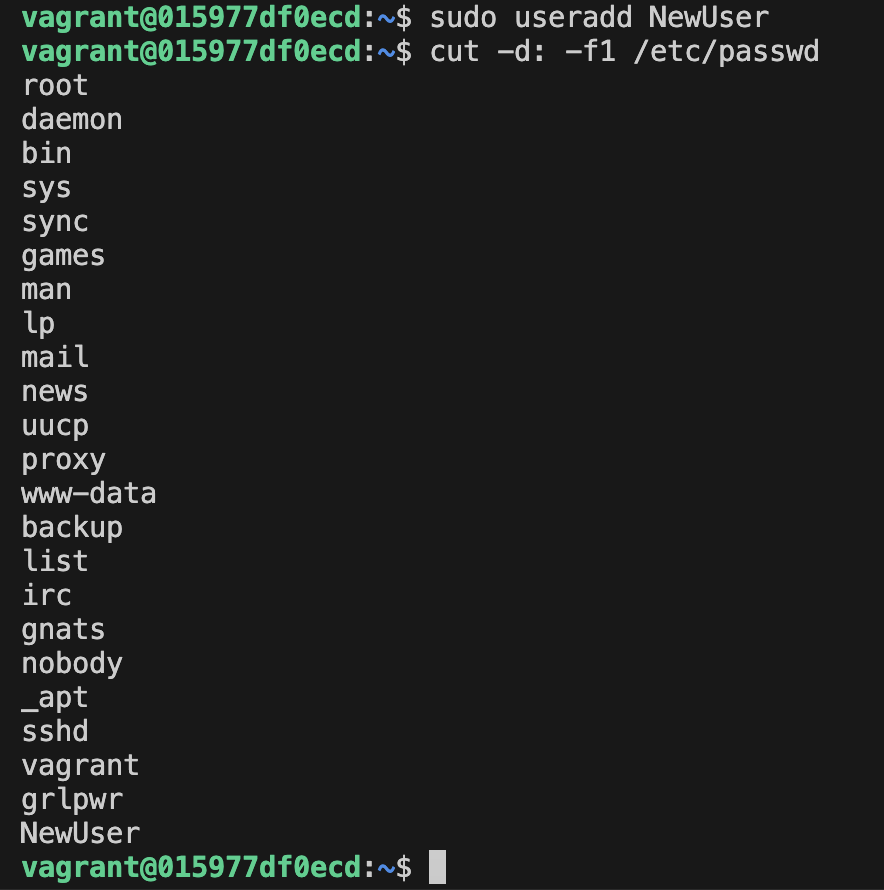
sudo: This command executes only that command with superuser privileges
If you are familiar with Windows and the right click run as administrator we can think of sudo as very much this.
In the example below, I can only create another user if the account I am using is listed under the "superuser do" group.
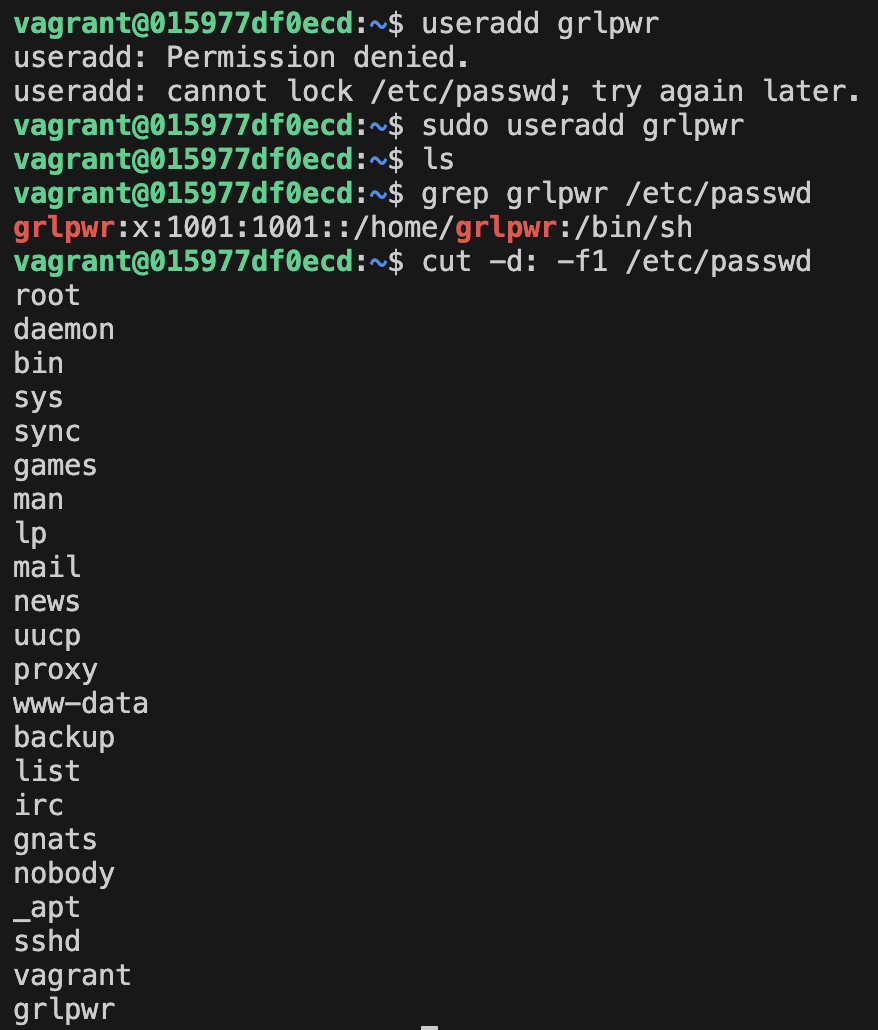
grep grlpwr /etc/passwd: Checks where the usergrlpwrhas been createdcut -d: -f1 /etc/passwd: To list all users on the systemsudo su: For one off jobs like installing applications or services, you might need thatsudo commandbut what if you have several tasks to deal with and you want to live assudofor a while? This is where you can usesudo su. In a test VM like ours, this is fine but I would find it very hard for us to be rolling around asrootfor prolonged periods, bad things can happen. To get out of this elevated position you simply type inexit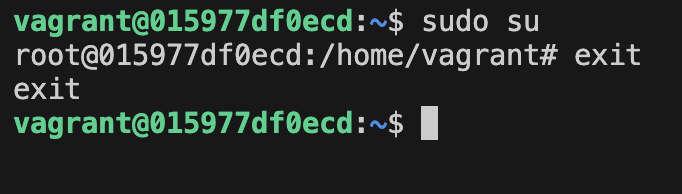
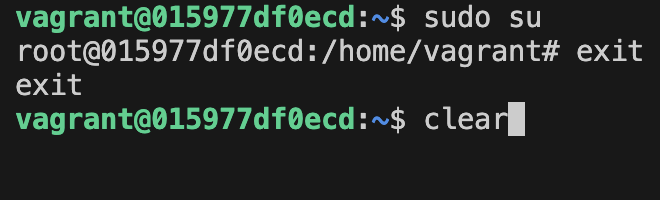
clear: Does exactly what it says it is going to clear the screen of all previous commands
Putting your prompt to the top and giving you a nice clean workspace.
mkdir: To create a folder or directory in the system
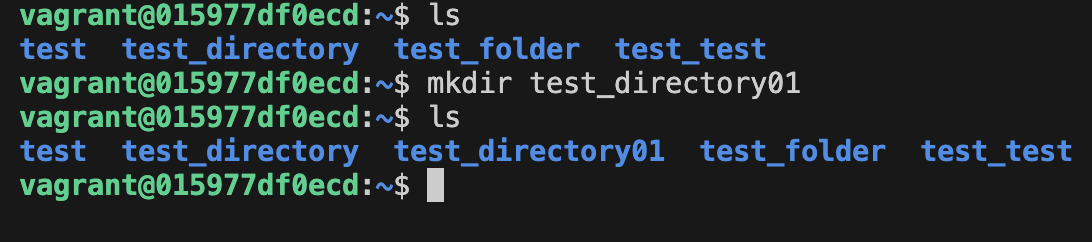
mkdir .NewFolder: make a hidden directory (also . before a file to make it hidden)mkdir <folder1Name> <folder2Name> <folder3Name> <folder4Name>: make multiple directories at the same time.mkdir /home/user/Mydirectory: make a new folder in a specific locationmkdir -p A/B/C/D: make a nested directory
ls: To list all the files and folders in the current directory
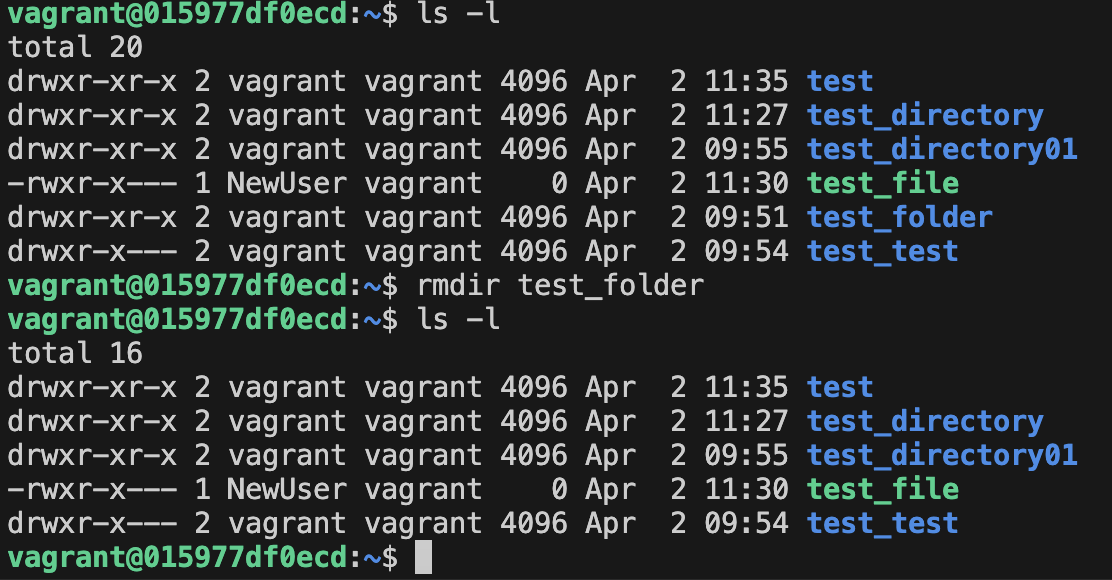
ls <option_flag_arguments>: list the sub directories and files avaiable in the present directoryls -l: list the files and directories in long list format with extra information
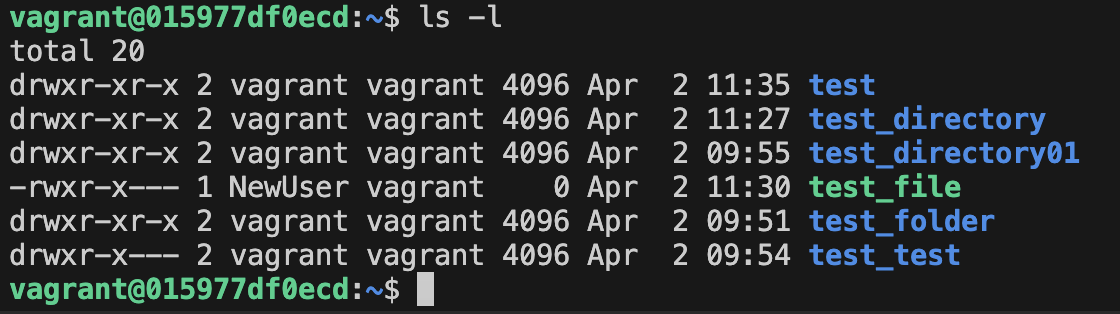
ls -a: Using ‘a’ flag, lists all the hidden contents in the specified directory
ls -la:To list detailed information about a specific file or directory, including its permissions, ownership, size, and modification date.
ls *.sh: list all the files having .sh extension.ls -i: list the files and directories with index numbers inodesls -d */:list only directories. (we can also specify a pattern)
Use wildcards:
ls *.png: Suppose your current directory contains hundreds of image files, but you only want to see the PNG files; the ones whose file names end with .pngls *.jpg *.jpegorls *.jp*g: Now let's say the current directory also contains JPEG files. Some end in .jpg, while others end in .jpeg.ls 000?.jpg: If the current directory contains files named 0001.jpg, 0002.jpg, and so on through 0009.jpg, this command lists them allls *.[jp]*: Yet another way to use wildcards to filter output is to use square brackets, which denote groups of characters. This command lists all the files in the current directory whose names contain a period immediately followed a lowercase J or P. It lists all the .jpg, .jpeg, and .png files, but not .gif filesls *.[jpJP]*: In Linux, file names and the commands that operate upon them are case-sensitive. So to list all the files in the current directory whose names contain periods followed by an uppercase or lowercase J or P.ls [a-z]*: this command lists all the files in the current directory whose names begin with a lowercase letterls [A-Z]*: This command, by contrast, lists all the files in the current directory whose names begin with an uppercase letterls [a-zA-Z]*: And this one lists all the files in the current directory whose names begin with a lowercase or uppercase letterls *\**: If you need to use one of the wildcard characters as an ordinary character, you make it literal or "escape it" by prefacing it with a backslash. So, if for some reason you had an asterisk as part of a file name — something you should never do intentionally
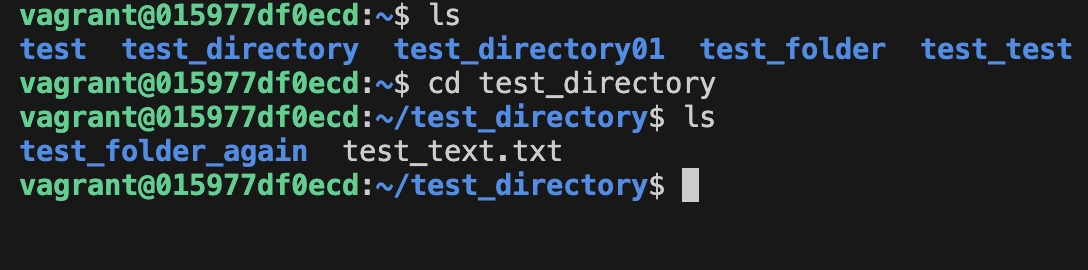
cd: To change the directory

cd path_to_directory: change directory to the provided pathcd ~or justcd: change directory to the home directorycd -: Go to the last working directory.cd ..: Change directory to one step back.cd ../..: Change directory to 2 levels back.
pwd: To printout of the current working directory
I am sure we have all done it where we have navigated to the depths of our file system to a directory and not known where we are.

touch: To create a new empty file
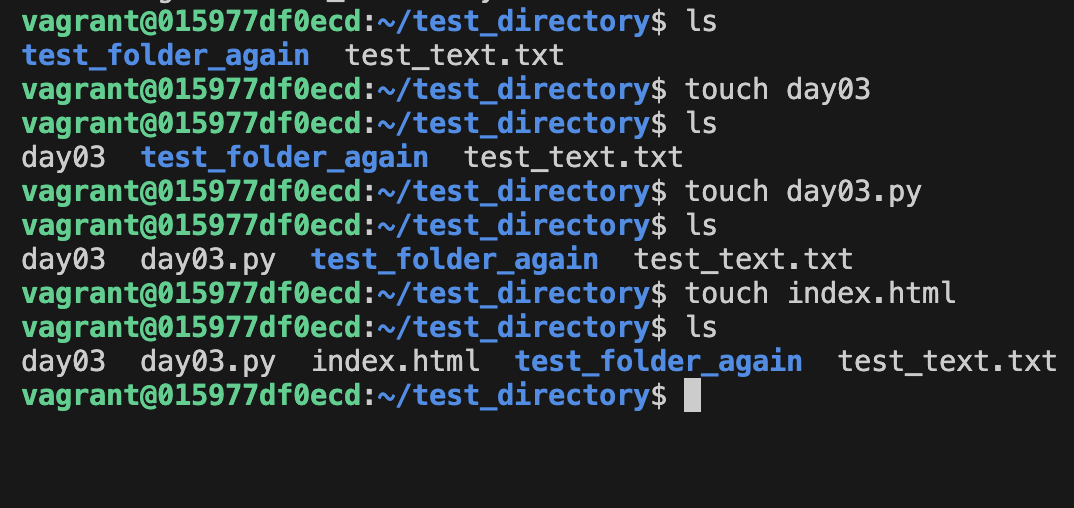
So, if you want to create a new empty file called "example.txt" using the
touchcommand, you would execute:touch example.txtOr a new empty file called "index.html" using the
touchcommand, you would execute:touch index.htmlBut if you just want to create a file without any extension, you can simply execute:
touch exampleIn all cases,
touchcreates an empty file, but the file extension is up to you to specify or leave out.
locate: How can we find files on our Linux system? locate is going to allow us to search our file system
If you do not have locate available to you, you can install it using this command sudo apt install mlocate.

mv: To move your files to different directory or folder
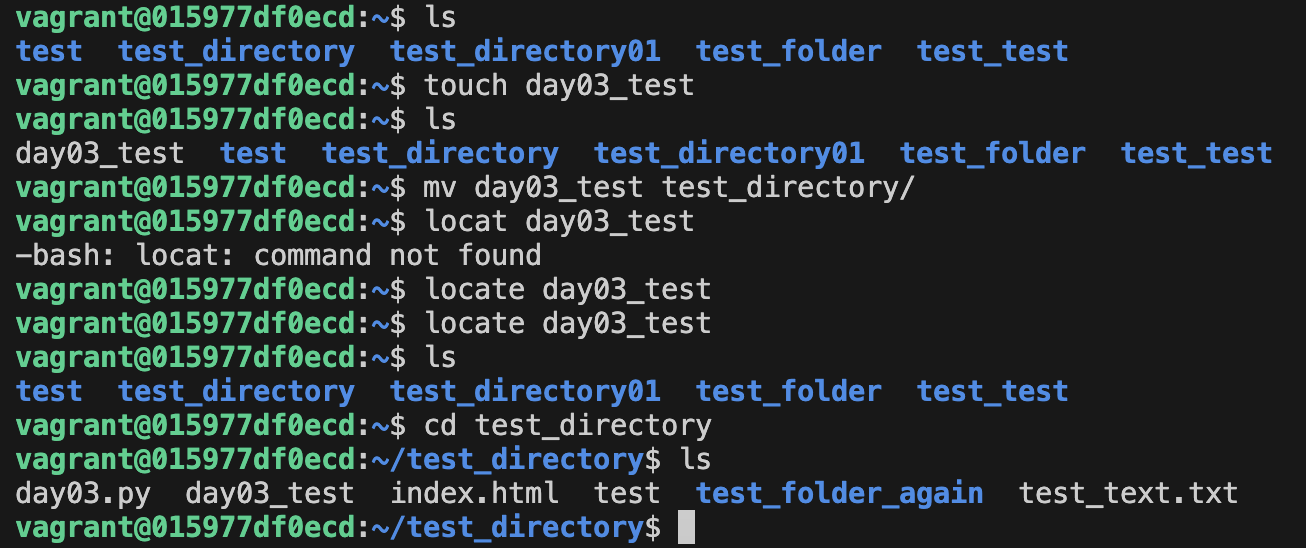
and to rename the files.

rm: To get rid or delete permanently a file or directory

rm *: This command deletes all the files in the current directoryrm -i *: Runningrmwith a-iflag lets you think before you deleterm -r test_folder_again/: To remove a non-empty directory and all its contents (including subdirectories and files), you can use the-ror--recursiveoption with thermcommand. For example:This command will recursively remove the directory
test_folder_again/along with all its contents. Make sure to use this command carefully, as it permanently deletes files and directories.To delete a directory, use the
rmdircommand. Be cautious, as it removes empty directories permanently.rmdir <directory_name>
cp: To copy files from one folder to another
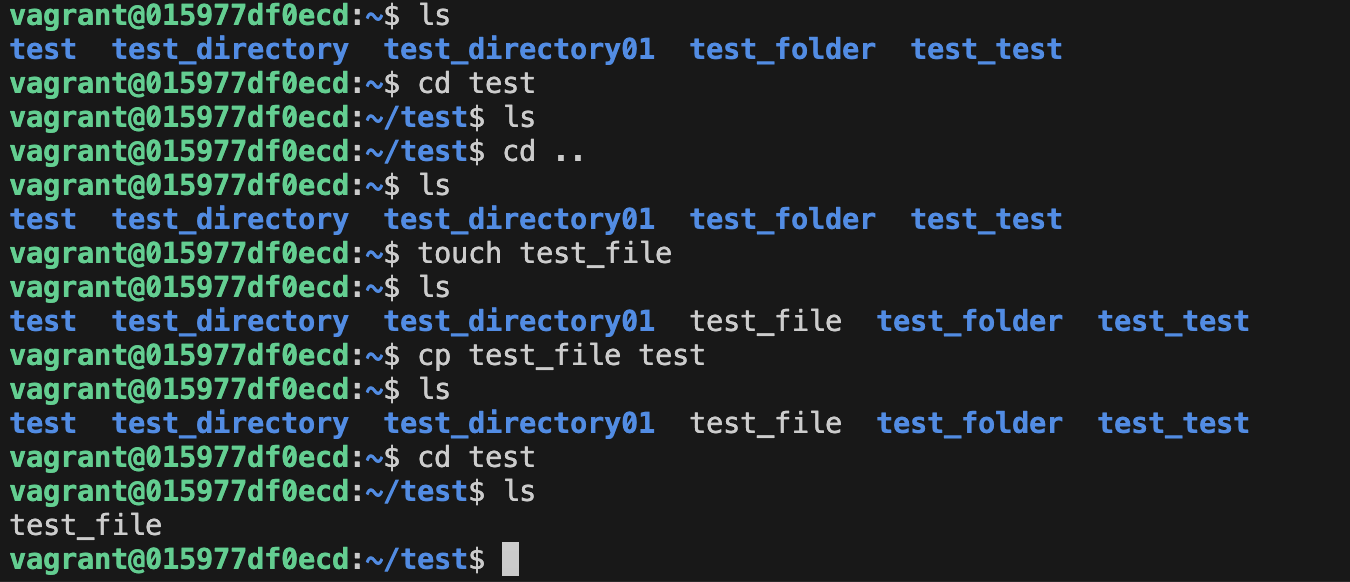
The cp command copies not just files, but entire directories (and subdirectories) if you want.
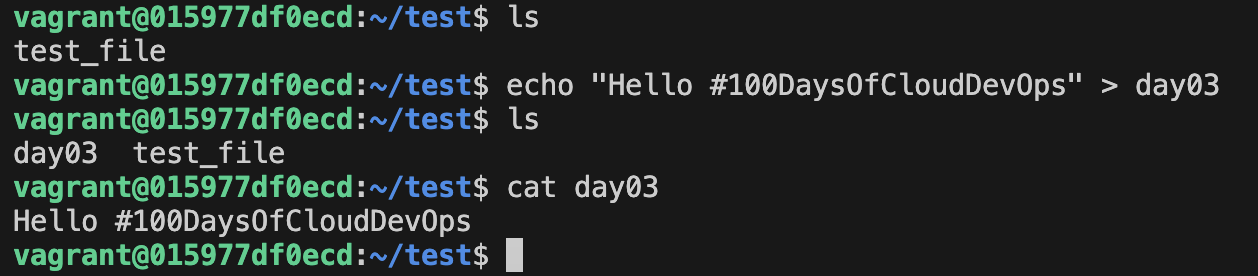
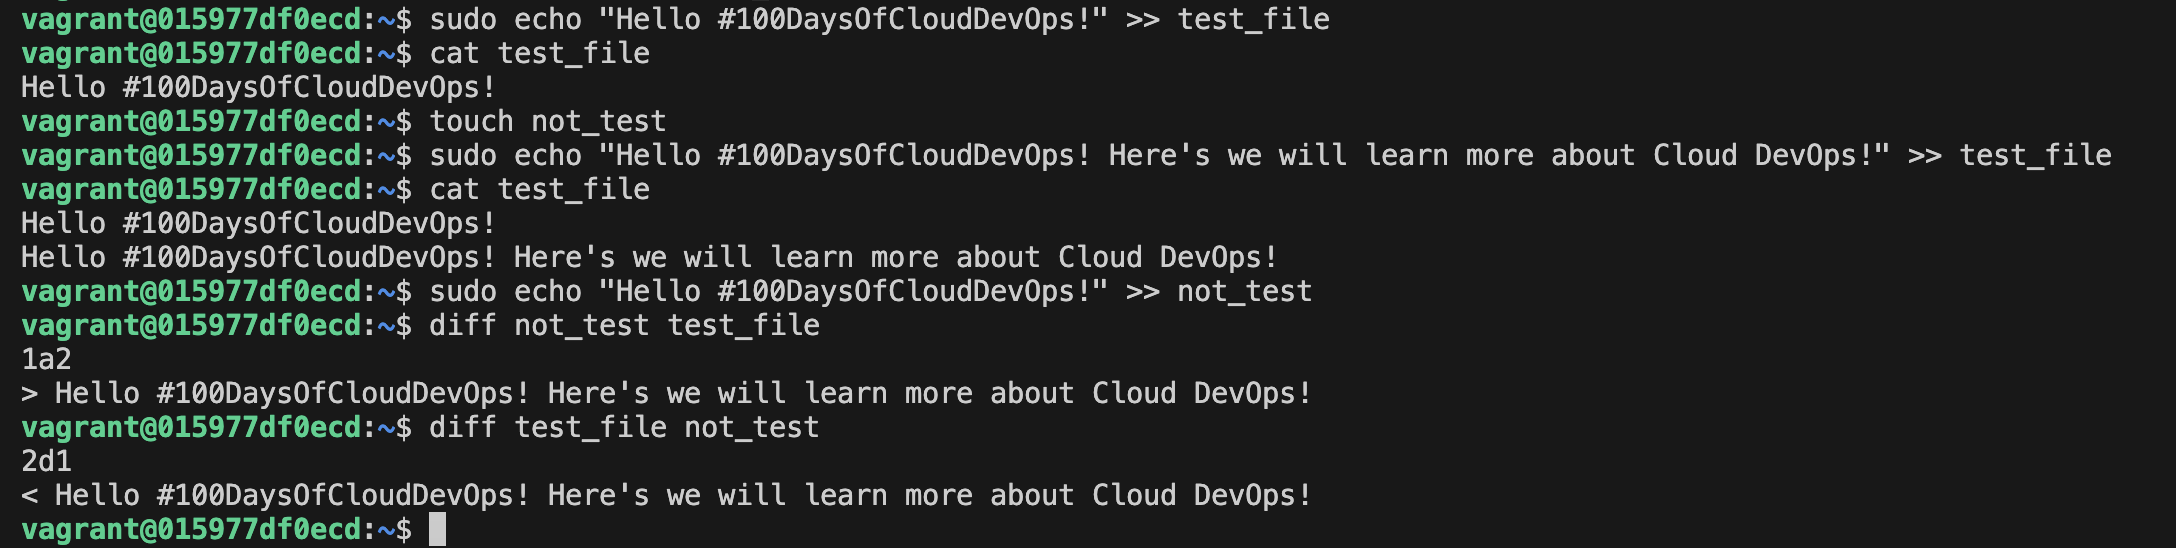
echo: An an easy way to add contents to a file

We can also append to our file using
echo "Commands are fun!" >> day03
cat: Short for concatenate. To see the contents inside the file.
Great for quickly reading those configuration files.
diff: Finding differences between files' contents
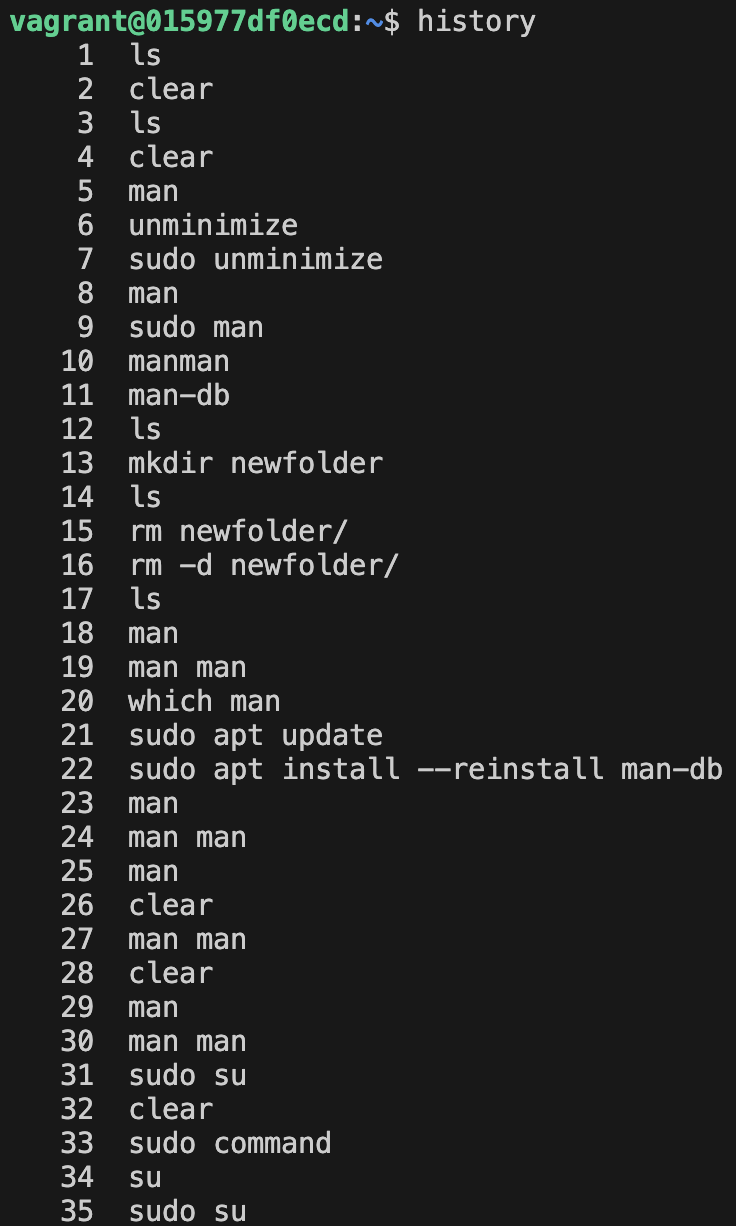
history: Display a list of previously executed commands in the current session
This command is particularly useful for recalling and reusing previously executed commands without having to retype them manually using !<number> or !5. This would execute the command associated with number 5 in your command history.
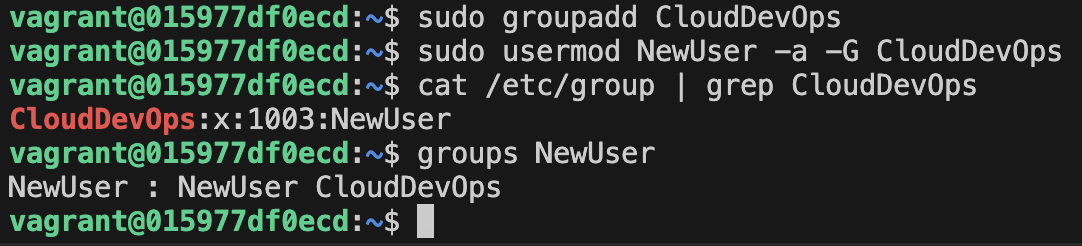
sudo useradd <unique username>: Creating a new user
sudo groupadd <unique groupName>: Creating a new group
Then if we want to add our new user to that group we can do this by running sudo usermod -a -G DevOps-a is add and -G is group name.
whoami: Display the username of the current user who is logged in to the system.
When you run the "whoami" command in the terminal and press Enter, it will output the username associated with your current session.

id: This is used to find out user and group names and numeric ID’s (UID or group ID) of the current user or any other user in the server.
Syntax: id <option> <user_name>

free: This command displays the total amount of free space available.
Along with the amount of memory used and swap memory in the system, and also the buffers used by the kernel.

ssh user@host: Connect to the host as a user.
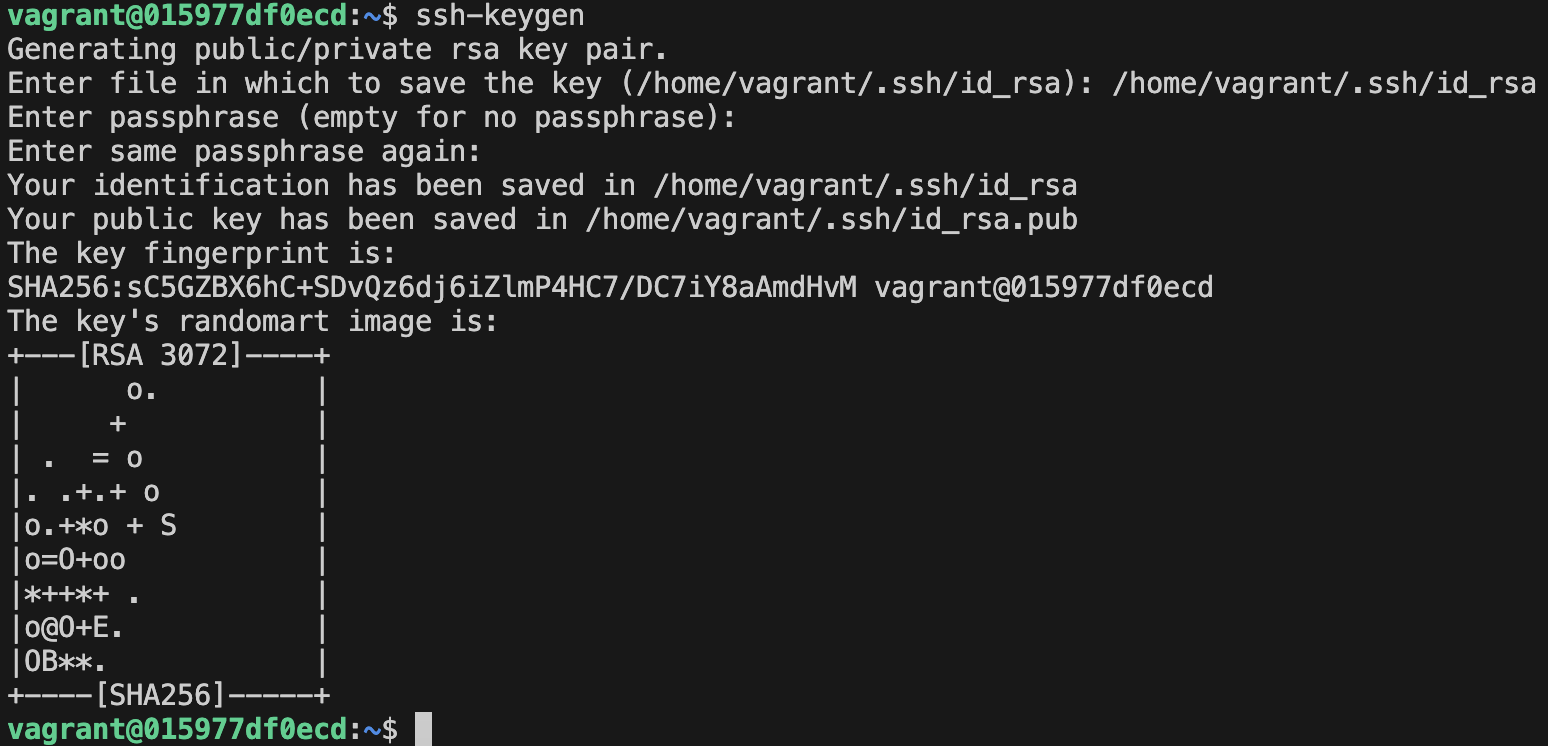
ssh-keygen: This command is used to generate a public/private authentication key pair.
This process of authentication allows the user to connect remote server without providing a password.
apt-get: This command is used to install, update, and remove packages, as well as to manage the package repository sources.
Here are some common apt-get commands:
apt-get update: This makes sure your computer knows about all the latest stuff available to download. It's like refreshing a webpage to see the newest content.
apt-get upgrade: This puts newer versions of things you already have on your computer. It also cleans up anything you don't need anymore.
apt-get install: This is how you add new stuff to your computer. For example, if you want a new text editor like nano, you would run
apt-get install nano.apt-get remove: This removes one or more packages, but it does not remove the configuration files for the package.
apt-get purge: This removes one or more packages and their configuration files.
apt-get autoremove: This removes packages that were installed as dependencies but are no longer needed.
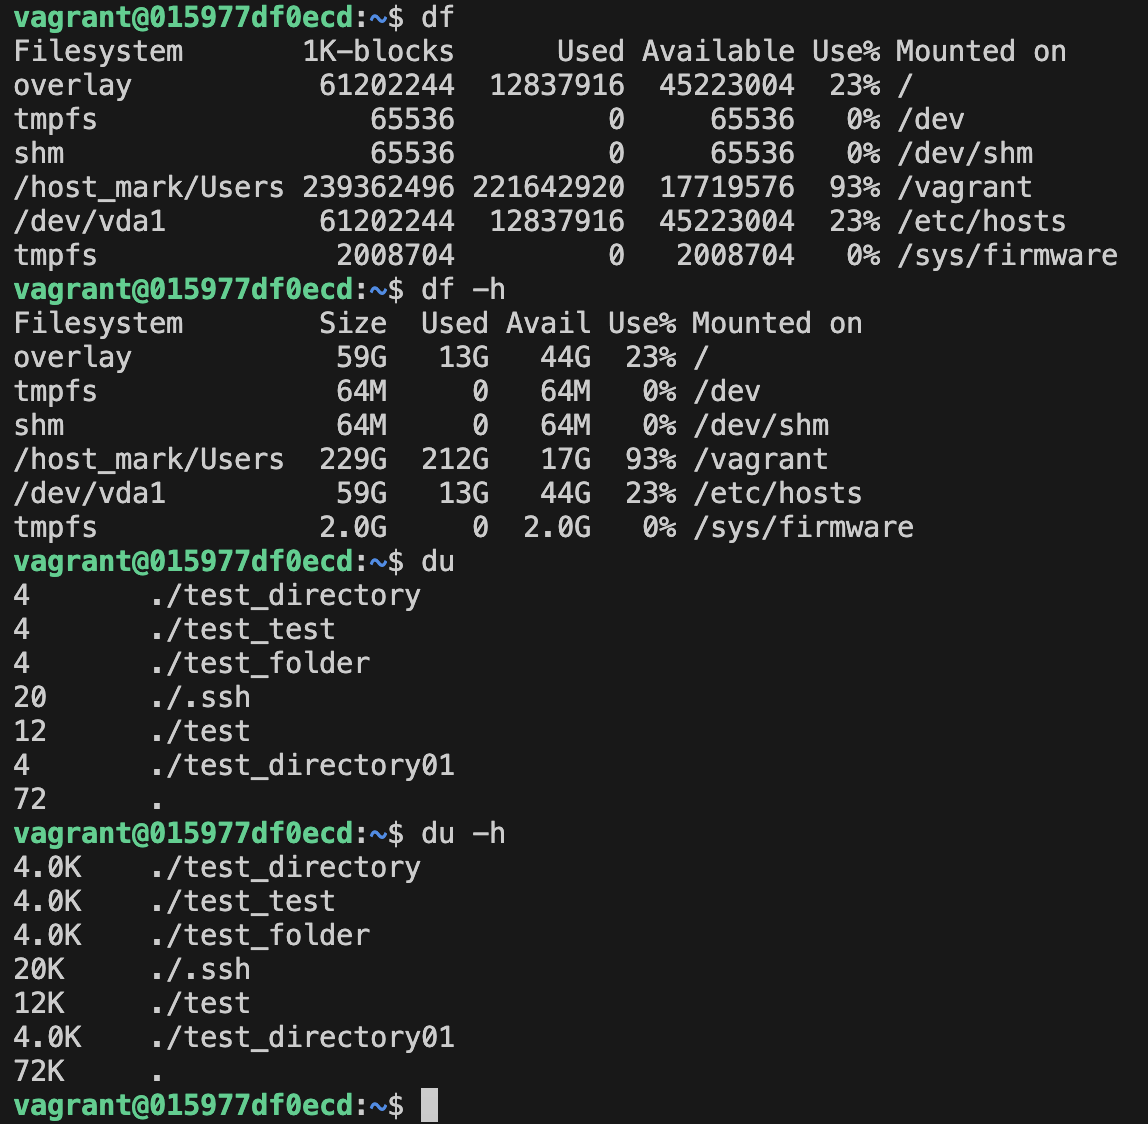
df: Df (disk free) command will have an account of available disk space, used by file system.
du: Du (disk usage) command reports the size of directory tree including all the content.
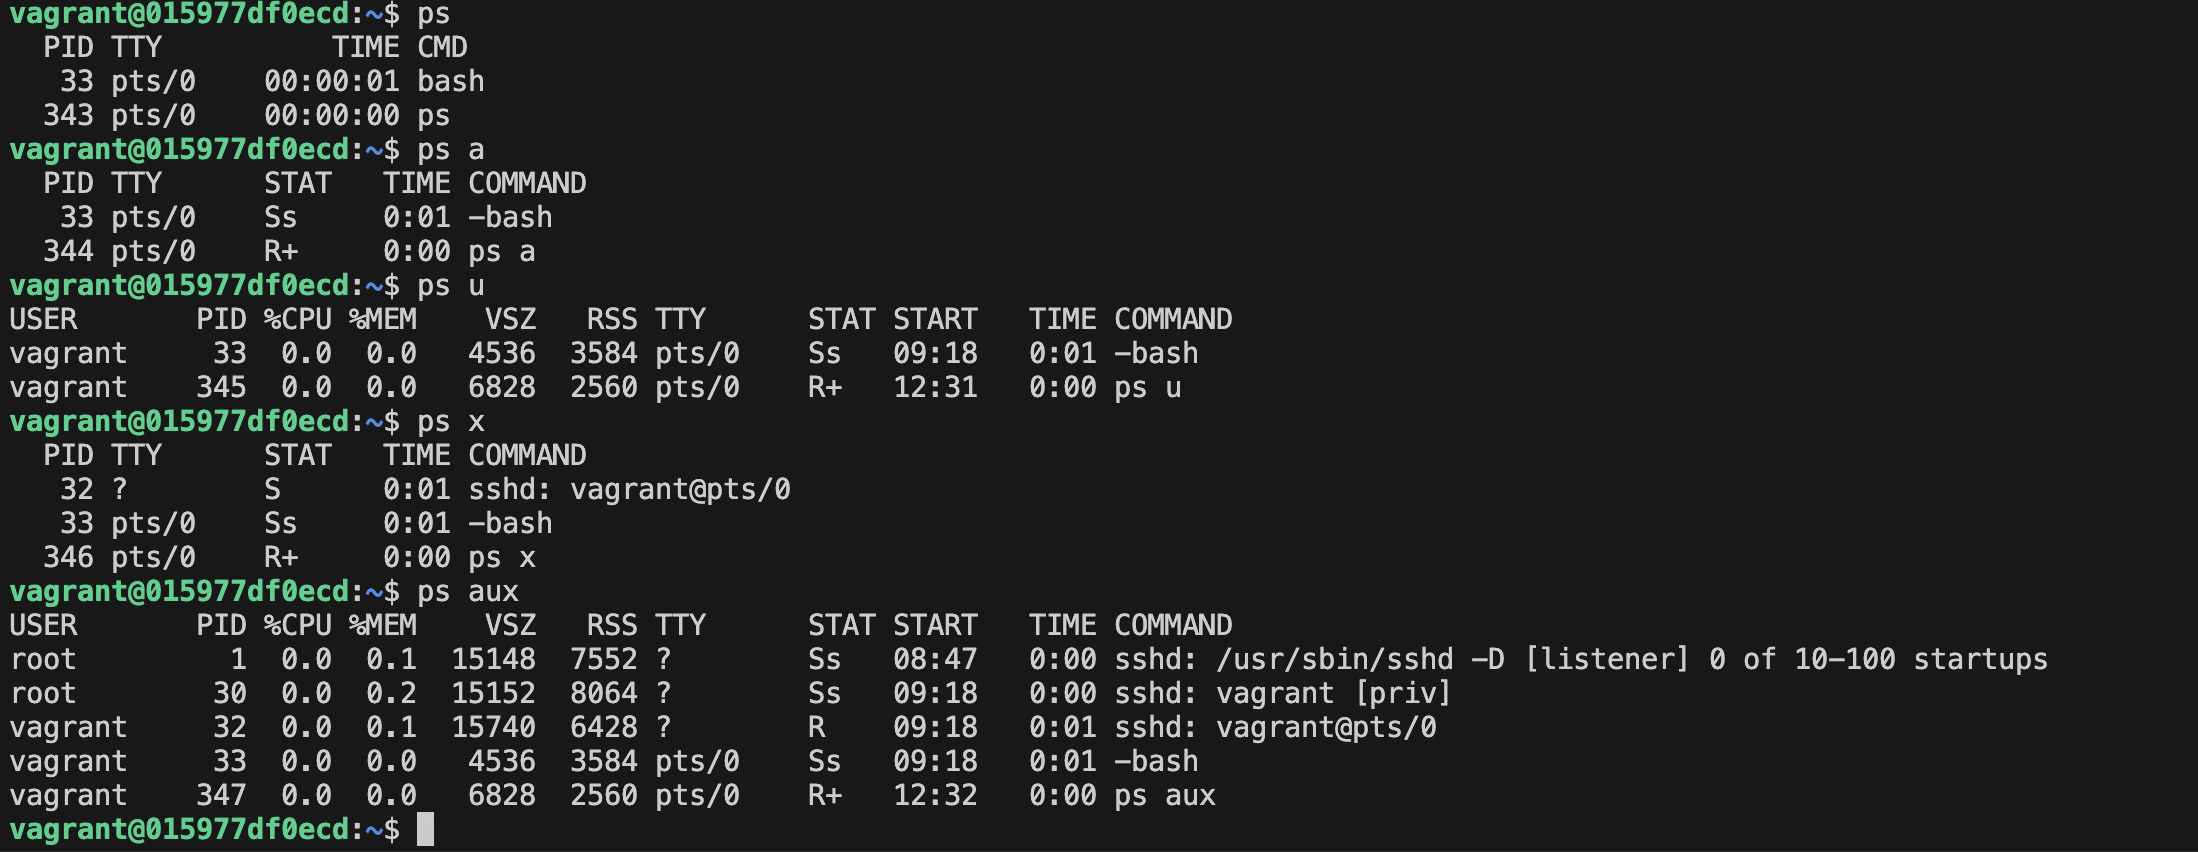
ps: We use ps command to check the unique id behind every process.
a = show processes for all users
u = display the process’s user/owner
x = also show processes not attached to a terminal
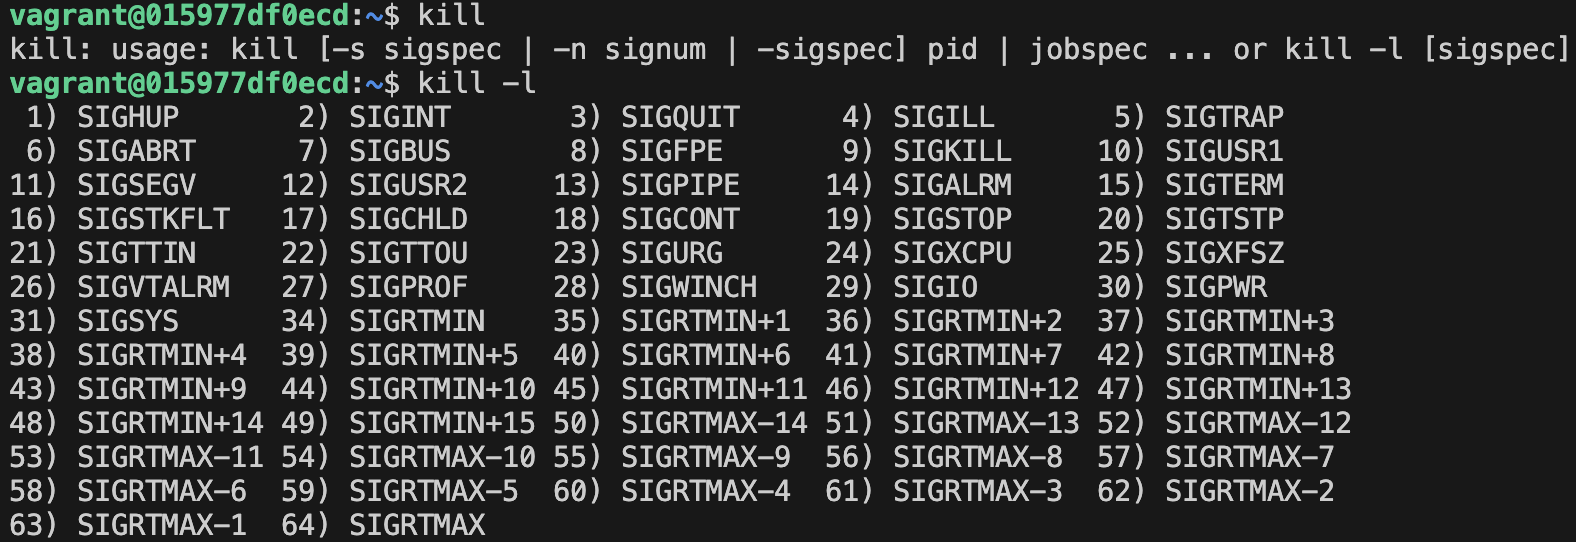
kill: This command is used to terminate processes manually.
This command basically, will send a signal that terminates it.
I/O operators
<for redirecting input to a source other than the keyboard>for redirecting output to destination other than the screen>>for doing the same, but appending rather than overwriting|for piping output from one command to the input of another
File and Directory Permissions
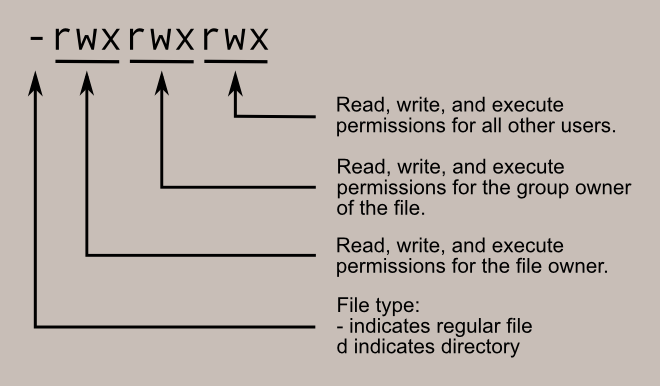
read, write and execute are the permissions we have on all of our files and directories on our Linux system. These permissions determine what actions users, groups, and others can perform on a file or directory.
Full list:
0 = None
---1 = Execute only
--X2 = Write only
-W-3 = Write & Execute
-WX4 = Read Only
R--5 = Read & Execute
R-X6 = Read & Write
RW-7 = Read, Write & Execute
RWX
-rwxrwxrwx represents User - Group - Everyone
Read more about this topic here.
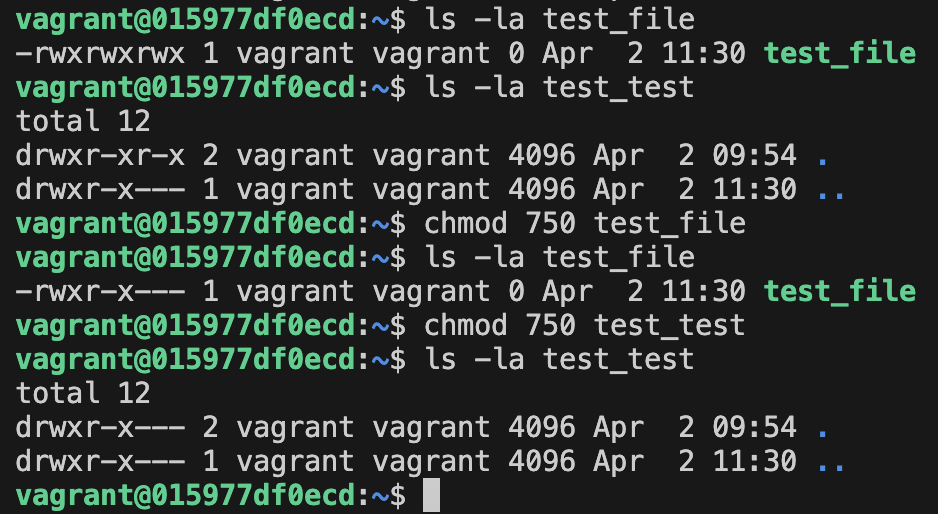
chmod <binary> <file or directory name>: This command is used to change the access permissions of files and directories.
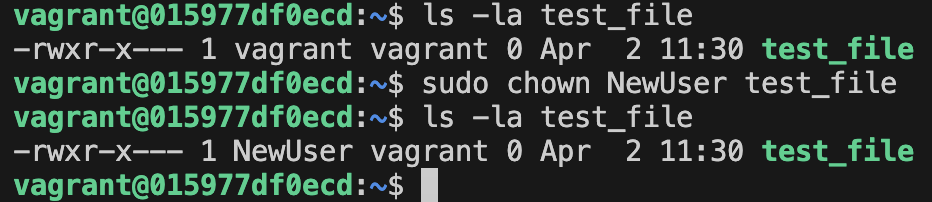
sudo chown <new owner> <filename>: This command is used to change the file Owner or group.
Did I missed something important? Feel free to add more in the comment box. 🤠
These Linux commands are the building blocks of system administration, enabling Cloud DevOps Engineers to perform a wide range of tasks with confidence and efficiency. Whether it's managing files, navigating directories, or configuring system settings, each command serves a unique purpose. So, use these commands, experiment with them, and watch as your mastery of Linux grows, opening up new possibilities and opportunities along the way.
Find the GitHub repo here.
If you find this blog helpful too, give back and show your support by clicking heart or like, share this article as a conversation starter and join my newsletter so that we can continue learning together and you won’t miss any future posts.
Thanks for reading until the end! If you have any questions or feedback, feel free to leave a comment.
