Table of contents
- What is PostgreSQL?
- What is RDBMS?
- Requirements
- Create a GitHub Repository with a README file and clone this in your local machine using SSH connections
- Create a requirements.txt list
- Create a Dockerfile
- Create a Docker Compose file that includes the Django app and PostgreSQL
- Build a Docker image and run the containers
- Connect Django app and PostgreSQL
- Test if the connection of the DB by applying the migrations
In this article, I delve into the practical aspects of integrating PostgreSQL with Django app using Docker Compose. For those seeking an alternative to MySQL, PostgreSQL offers robust data management capabilities through its relational database management system (RDBMS).
What is PostgreSQL?
Imagine PostgreSQL as a powerful tool for organizing and managing data in a structured way. It's a type of database management system (DBMS) specifically designed to handle large amounts of data efficiently. Think of it as a digital warehouse where you can store and retrieve information easily.
PostgreSQL uses a method called relational database management system (RDBMS), which means it stores data in tables and allows you to establish relationships between different tables.
What is RDBMS?
RDBMS stands for "Relational Database Management System." It's a type of software that helps store, organize, and manage data in a structured way using tables and relationships between them.
Requirements
Python 3
Git / GitHub
Visual Studio Code (or any text editor of your choice)
pip
Docker
Docker-compose (which comes bundled with Docker installation)
Docker Desktop (or Docker Engine)
To check the version of Docker Compose installed on your system, you can run the following command in your terminal:
docker-compose --version
Once you've got everything above, we can get started on building something awesome!
Create a GitHub Repository with a README file and clone this in your local machine using SSH connections
Here are the step-by-step instructions to achieve this:
Create a GitHub Repository:
Go to GitHub.
Log in to your account.
Click on the "+" sign in the top-right corner and select "New repository."
Enter a name for your repository, optionally add a description, choose whether it should be public or private, and click "Create repository."
Add a README file:
Set up SSH Key:
- If you haven't already set up an SSH key, you need to generate one. Open a terminal window on your local machine.
Generate SSH Key:
Run the following command to generate a new SSH key. Replace
<your_email@example.com>with your email address connected to your GitHub account.ssh-keygen -t rsa -b 4096 -C "your_email@example.com"Press Enter to accept the default file location and optionally enter a passphrase (recommended).
Add SSH Key to SSH Agent:
Start the SSH agent by running the command:
eval "$(ssh-agent -s)"Add your SSH private key to the SSH agent:
ssh-add ~/.ssh/id_rsa
Add SSH Key to GitHub:
Copy the SSH key to your clipboard:
cat ~/.ssh/id_rsa.pubGo to your GitHub account settings.
Click on "SSH and GPG keys" in the left sidebar.
Click on "New SSH key" and paste your SSH key into the "Key" field.
Give your key a descriptive title and click "Add SSH key."
Clone Repository:
Go to your repository on GitHub.
Click on the green "Code" button and make sure "SSH" is selected.
Copy the SSH URL provided.
Open a terminal window and navigate to the directory where you want to clone the repository.
Run the following command, replacing
<repository_url>with the SSH URL you copied:git clone <repository_url>This will clone the repository to your local machine.
Now you have successfully created a GitHub repository, added a README file, set up SSH keys, and cloned the repository to your local machine using SSH.
Create a requirements.txt list
Keep in consideration the dependencies required for PostgreSQL like psycopg2-binary.
Generate a list of dependencies using:
$ pip freeze > requirements.txt
$ cat requirements.txt
asgiref==3.8.1
certifi==2024.2.2
charset-normalizer==3.3.2
Django==5.0.4
docker==7.0.0
idna==3.7
packaging==24.0
requests==2.31.0
sqlparse==0.4.4
urllib3==2.2.1
psycopg2-binary>=2.9
Create a Dockerfile
What exactly is a Dockerfile? Crafting one might seem daunting initially, but think of it simply as a recipe for creating personalized Docker images.
Setup Docker:
It's essential to set up Docker and Docker Desktop on your local system. For educational purposes, opt for Docker Community Edition.
Make the docker app image:
The next step is to include a Dockerfile in your project. A Dockerfile can be seen as a set of steps to construct your image and later your container.
To begin, make a new file named Dockerfile in the main directory of your project. Then, follow each step carefully, just like in the example provided.
    # Use the official Python image for an Operating System
    FROM python:3.12

    # Ensure Python outputs everything that's printed inside the application
    # Any errors logs sends straight to the terminal, we get the message straight away
    # 1 means non empty value
    ENV PYTHONUNBUFFERED=1

    # Set working directory in the container
    WORKDIR /django

    # Copy the requirements file into the container
    COPY requirements.txt requirements.txt

    # Upgrade pip
    RUN pip install --upgrade pip
    # Install Python dependencies
    RUN pip install --no-cache-dir -r requirements.txt
FROM python:3.12 - The first instruction in the Dockerfile, "FROM python:3.12," tells Docker which image to start building our container from. We're using the official Python image from Dockerhub, which already has Python and Linux set up for you, all ready to go for a Python project.
ENV PYTHONUNBUFFERED=1 - Python show everything it prints immediately and send any error messages directly to the screen.
WORKDIR /django - the working directory inside the container to a folder named 'django'.
COPY requirements.txt requirements.txt - the 'requirements.txt' file from your local machine into the container.
RUN pip install --upgrade pip - pip to the latest version.
RUN pip install --no-cache-dir -r requirements.txt - all the Python packages listed in 'requirements.txt' without storing any temporary files.
Create a Docker Compose file that includes the Django app and PostgreSQL
What is Docker Compose file? With a Docker Compose file, you can list out all the services you need for your project, along with their settings and how they should talk to each other. It's like giving each container a set of instructions so they know how to work together harmoniously.
In practical terms, this means that developers can specify the services (containers) required for their application, along with their respective configurations and dependencies, within a Docker Compose file. This file serves as a blueprint or declarative representation of the application's architecture and runtime environment.
So, in simple terms, a Docker Compose file is like a manager for your services, making sure they all play nice and work together smoothly without you needing to babysit each one individually. Cool, right?
# what version of docker compose, adjust to the latest version
version: '3.8'
services:
  app:
    build: .
    volumes:
    # /django is the workdir from the Dockerfile
      - .:/django
    # Define ports so we can access the container
    ports:
    # Port 8000 from your computer with Port 8000 of the container
      - 8000:8000
    # name of the image
    image: app:imageName-django
    container_name: sturdy_container
    # why 0.0.0.0 and not 127.0.0.1?
    command: python manage.py runserver 0.0.0.0:8000
    # Define the running order
    depends_on:
      - db
  db:
    image: postgres
    # ./data/db: This is to connect and save the database data in our computer
    # /var/lib/postgresql/data: the data is located from this containerized db
    volumes:
      - ./data/db:/var/lib/postgresql/data
    environment:
      - POSTGRES_DB=postgres
      - POSTGRES_USER=postgres
      - POSTGRES_PASSWORD=postgres
    container_name: postgres_db
version: '3.8' - This line specifies the version of Docker Compose configuration being used. In this case, it's version 3.8.
services: - This line indicates the start of the services section, where you define the containers you want to run.
app: - This defines a service named "app". You can name this whatever you like, but to practice the convention, choose something that is logical and what the service is.
build: . - This line tells Docker Compose to build the Docker image using the Dockerfile located in the current directory (
.).volumes: - .:/django - This line sets up a volume that maps the current directory (.) on your computer to the
/djangodirectory within the container.ports: - 8000:8000 - This line maps port 8000 on your computer to port 8000 within the container, allowing you to access the containerized application via port 8000.
image: app:imageName-django - This line specifies the name of the Docker image that will be created for the "app" service.
container_name: sturdy_container - This line sets the name of the container to "sturdy_container".
command: python manage.py runserver 0.0.0.0:8000 - This line specifies the command to run when the container starts. It runs the Django development server (
python manage.py runserver) and binds it to0.0.0.0:8000, making the server accessible from any network interface on port 8000.depends_on: - db - This line specifies that the "app" service depends on the "db" service, meaning the "db" service will be started before the "app" service.
db: - This defines a service named "db".
image: postgres - This line specifies the Docker image to be used for the "db" service, in this case, it's the official PostgreSQL image from Docker Hub.
volumes: - ./data/db:/var/lib/postgresql/data - This line sets up a volume that maps the
./data/dbdirectory on your computer to the/var/lib/postgresql/datadirectory within the container, allowing you to persist PostgreSQL data on your host machine.environment: - This line sets environment variables required by the PostgreSQL container, such as the database name, username, and password.
container_name: postgres_db - This line sets the name of the container to "postgres_db".
Build a Docker image and run the containers
To build the Docker image, use the following command:
docker-compose build
- Note that we are only building the image. There will be no container running here.
To run the container, execute the following steps:
docker-compose run --rm <imageThatYouwantToUse> django-admin startproject core .
docker-compose: This tells your computer to use Docker Compose, a tool for defining and running multi-container Docker applications.run: This command tells Docker Compose to run a command inside a service.--rm: This flag tells Docker Compose to remove the container after it exits. It helps keep things clean by getting rid of temporary containers.Check out the docker-compose file command. What it all does is run the server of the Django app. With
django-admin startproject core .we'll first create the app.
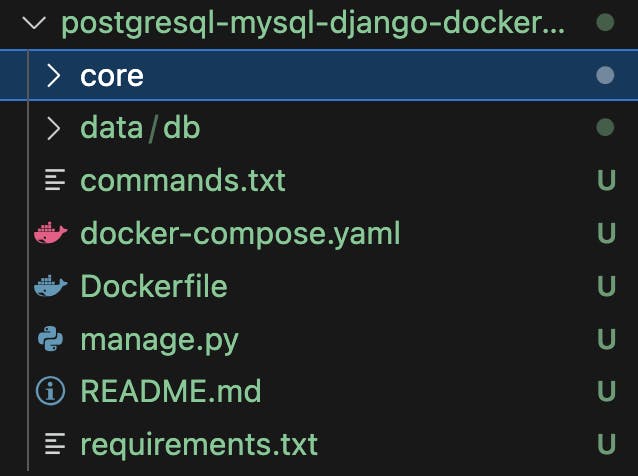
If you check your files now, you will see the Django app file named core, the postgres db file named db and manage.py file:

To start all the services defined in your Docker Compose configuration:
docker-compose up
When you run docker-compose up, Docker Compose reads your docker-compose.yml file, builds any necessary images, creates containers for each service, and then starts those containers.
This command is handy because it automates the process of starting your multi-container Docker applications. It handles tasks like creating networks for your services to communicate, setting up volumes, and running containers with the specified configurations.
Additionally, docker-compose up will stream the logs of all the containers to your terminal, so you can see the output from each service in real-time. It's one of the fundamental commands used when working with Docker Compose.
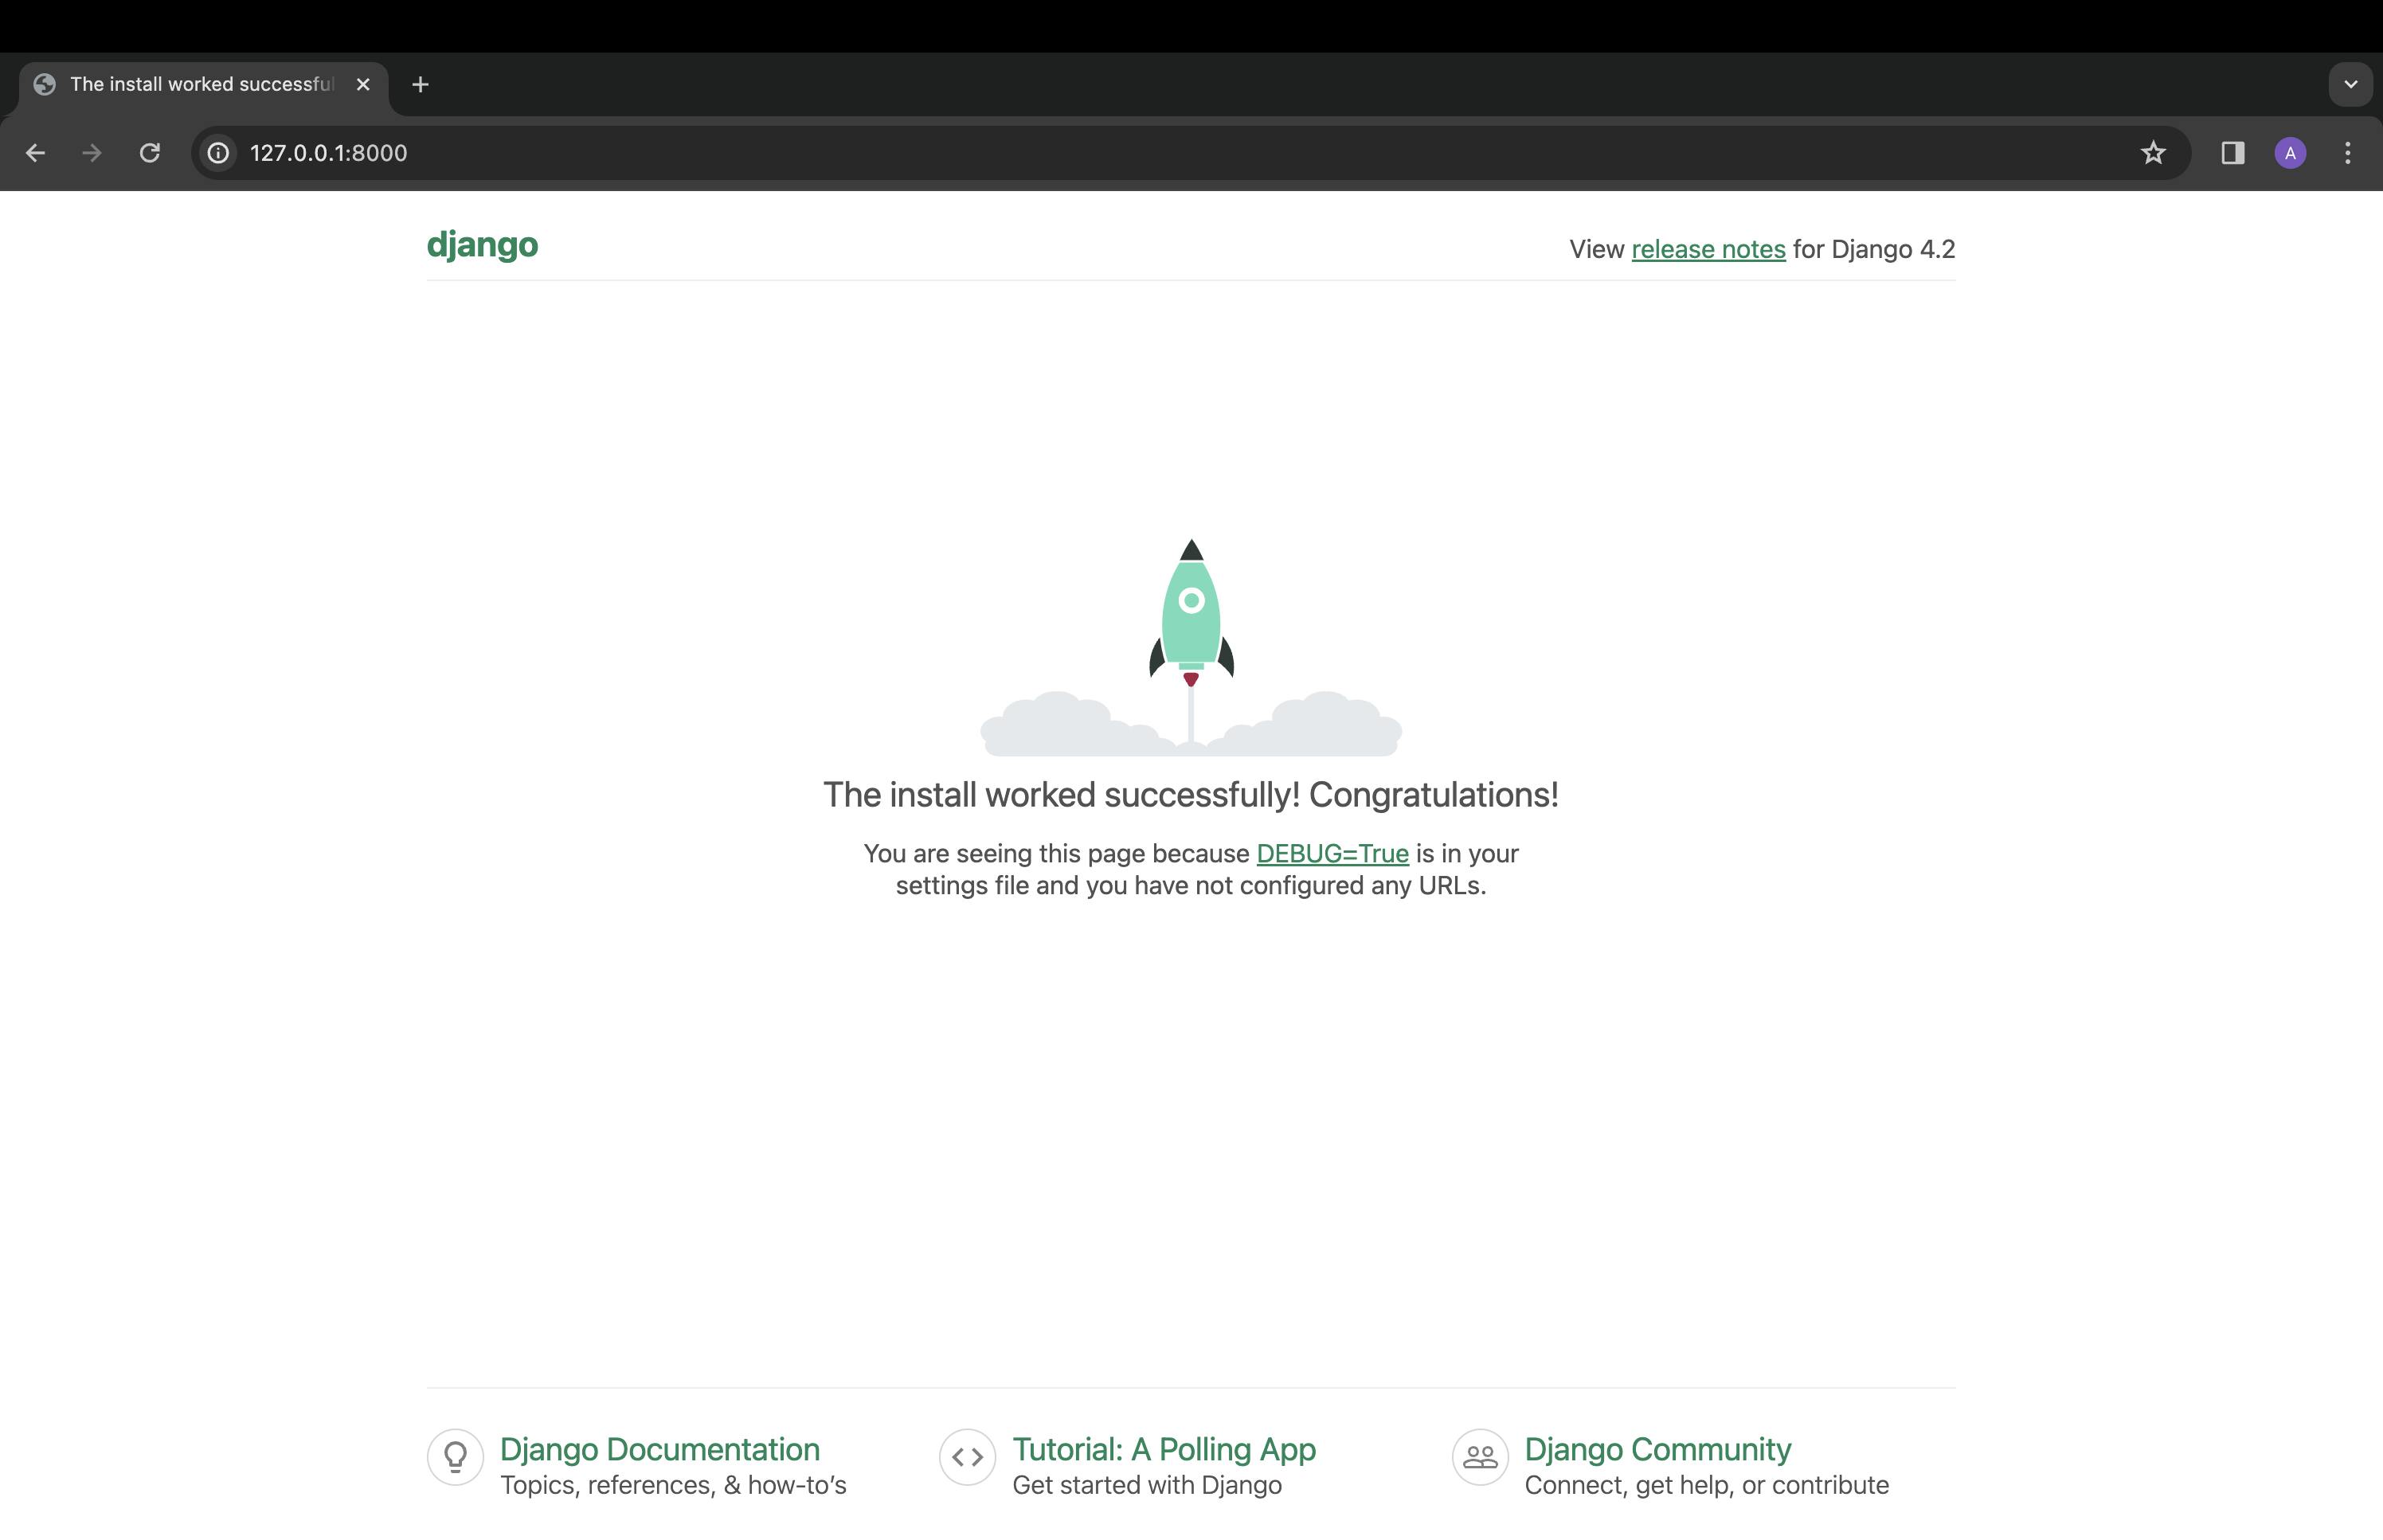
Go to your web browser at http://127.0.0.1:8000/ or http://localhost:8000.

- (Optional): To see what Docker containers are running on your system (with their IDs):
$ docker ps -a
- (Optional): To stop your Docker container:
$ docker stop container_id
Connect Django app and PostgreSQL
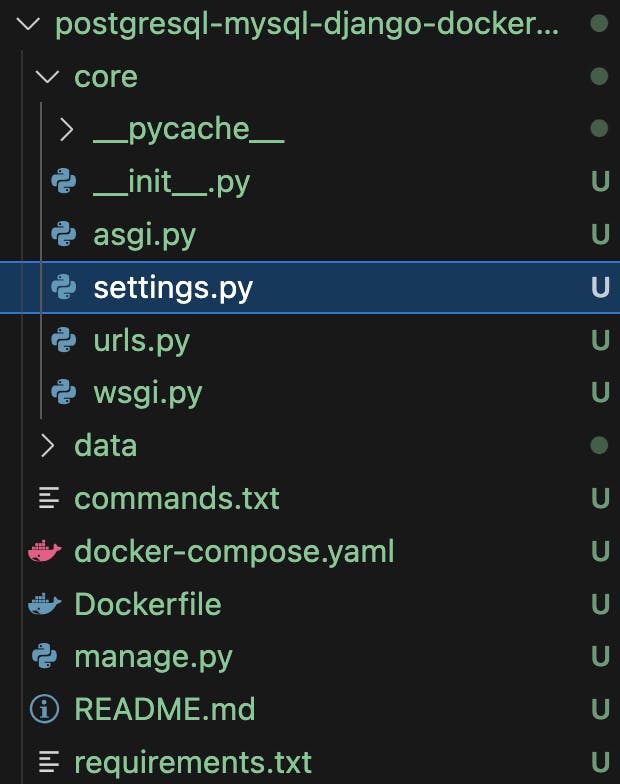
Go to setting.py of your Django app.

Locate the DATABASES setting, then remove the default db setting for sqlite3 from that part.
Next, include the subsequent line and complete the fields as required:
DATABASES = {
    'default': {
        'ENGINE': '',
        'NAME': '',
        'USER': '',
        'PASSWORD': '',
        'HOST': '',
        'PORT': '',
    }
}
You will find the settings for postgres at your docker-compose.yaml file.
DATABASES = {
    'default': {
        'ENGINE': 'django.db.backends.postgresql',
        'NAME': 'postgres',
        'USER': 'postgres',
        'PASSWORD': 'postgres',
        'HOST': 'db',  # or the hostname of your PostgreSQL server (in this project at docker-compose.yaml file )
        'PORT': '5432',  # default PostgreSQL port
    }
}
⚠️ Don't share your credentials in production deployment.
Now, this connects the Django app and PostgreSQL DB.
Re-run the following command to start the containers or services with the new configurations:
docker-compose up
Test if the connection of the DB by applying the migrations
Before doing anything with the database, it's important to make sure we can talk to it. This step helps us verify that everything is set up correctly and we can communicate with our database server.
How to Do It:
Accessing the Docker Container:
Open your terminal or command prompt.
Type
docker exec -it <containerName> /bin/bashand press Enter.This command lets us enter the Docker container where our application is running. It's like stepping inside our app's environment.
Mine looked like this:
  (base) $ docker exec -it sturdy_container /bin/bash
  root@612e47538720:/django# ls
  Dockerfile  README.md  commands.txt  core  data  docker-compose.yaml  manage.py  requirements.txt
  root@xxxxxxxxxxxx:/django# python --version
  Python 3.11.5
  root@xxxxxxxxxxxx:/django# python manage.py makemigrations
Running the Migration Command:
Once inside the container, type
python manage.py makemigrationsand press Enter.Then type
python manage.py migrateand press Enter.This command tells Django, the web framework we're using, to apply any pending migrations to the database.
After running python manage.py migrate you will receive a response similar to this:
root@xxxxxxxxxxxx:/django# python manage.py migrate

Operations to perform:

  Apply all migrations: admin, auth, contenttypes, sessions

Running migrations:

  Applying contenttypes.0001_initial... OK

  Applying auth.0001_initial... OK

  Applying admin.0001_initial... OK

  Applying admin.0002_logentry_remove_auto_add... OK

  Applying admin.0003_logentry_add_action_flag_choices... OK

  Applying contenttypes.0002_remove_content_type_name... OK

  Applying auth.0002_alter_permission_name_max_length... OK

  Applying auth.0003_alter_user_email_max_length... OK

  Applying auth.0004_alter_user_username_opts... OK

  Applying auth.0005_alter_user_last_login_null... OK

  Applying auth.0006_require_contenttypes_0002... OK

  Applying auth.0007_alter_validators_add_error_messages... OK

  Applying auth.0008_alter_user_username_max_length... OK

  Applying auth.0009_alter_user_last_name_max_length... OK

  Applying auth.0010_alter_group_name_max_length... OK

  Applying auth.0011_update_proxy_permissions... OK

  Applying sessions.0001_initial... OK

root@xxxxxxxxxxxx:/django#
In summary, this article serves as a comprehensive guide to seamlessly integrating PostgreSQL with Python Django using Docker Compose. From understanding the fundamentals of PostgreSQL as an RDBMS to setting up the development environment and connecting Django applications to PostgreSQL databases.
Find the GitHub repo here. I've included the errors I've encountered and how I solved it.
I trust we all learned something from this blog. If you found it helpful too, give back and show your support by clicking heart or like, share this article as a conversation starter and join my newsletter so that we can continue learning together and you won’t miss any future posts.
Thanks for reading until the end! If you have any questions or feedback, feel free to leave a comment.
